
CATEGORY ARCHIVES: HOMEMADE GIFTS
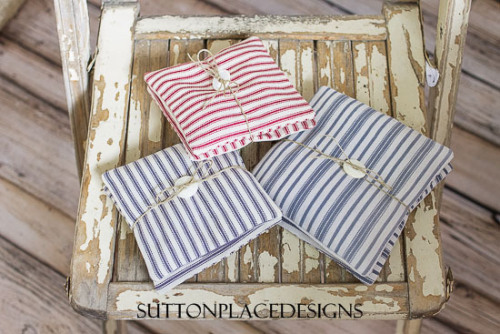
Lavender Sachets
We love to read other blogs for inspiration. One blog that we’ve enjoyed recently is Sutton Place Designs. Since Debra and I both sew, we’ve paid particular attention to Ann’s beautiful sewing projects. Her lavender sachets caught our attention.
Due to our frequent thrifting excursions, we both have a fair amount of material stashed away. Debra had a beautiful piece of old cotton grain sack with a sweet pink and light blue stripe running through the middle. Since it was stained in several places, cutting it into squares for lavender sachets seemed to be the best use for it. Debra cut the material into 7 inch squares, being careful to avoid any holes or stains. She then handed the squares off to me for sewing and filling with lavender. I’m so pleased with the results.
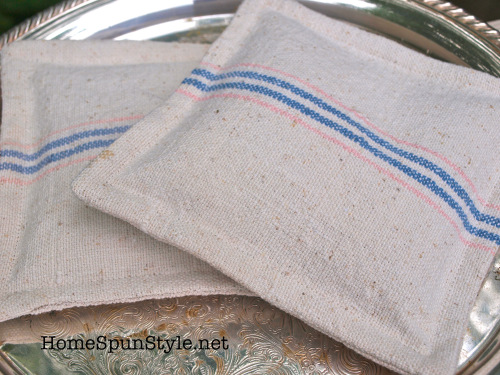
To maximize the grain sack material, we used a simple cotton drop cloth for the back. The two fabrics married well together and you can hardly tell the difference between the two.
With right sides together, I stitched around the perimeter of the square, leaving about three inches open on one side. I then clipped the corners and turned the material right side out. I filled each sachet with one and a half cups of lavender and whip stitched by hand the three-inch opening. I then top stitched around the perimeter of the satchet to finish it off.
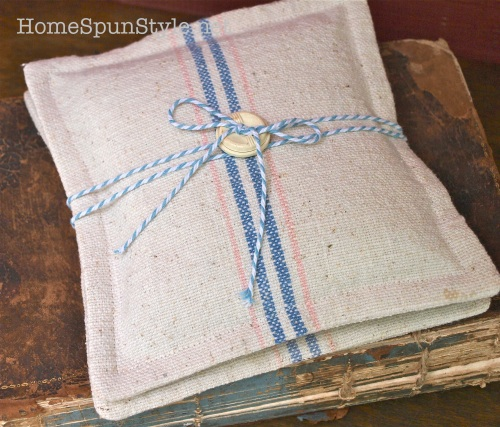
I bundled two sachets together and tied them up with blue and white twine and a vintage button, also thanks to the inspiration of Sutton Place Designs. Be sure to check out Ann’s beautiful blog and store!
As always, our favorite projects are those that are upcycled. We love to take something that is damaged, worn, stained or bound for the trash and make it into something new and beautiful. Hope this inspires you as well!
Map picture frame and other map crafts
I was all set to work on our weekly blog post last week but ended up coming down with Walking Pneumonia. I’m not sure how I managed to stay healthy all winter but come down with Pneumonia right as the weather gets beautiful but that’s what happened! Fortunately, I have a great business partner who was able to jump in and give another update of her beautiful kitchen. It’s so fun to see the progress!
Hope all of you had a wonderful Mother’s Day! I had the privilege of getting away with my oldest daughter, Ingrid, to a retreat center (Tuscarora Inn and Conference Center) where we led one of the creative activities: embellished picture frames. We had piles of craft materials for the ladies to be creative with. I chose to use a PA map for my craft frame. I’ve been into maps lately so they’re all over my house right now in various forms.
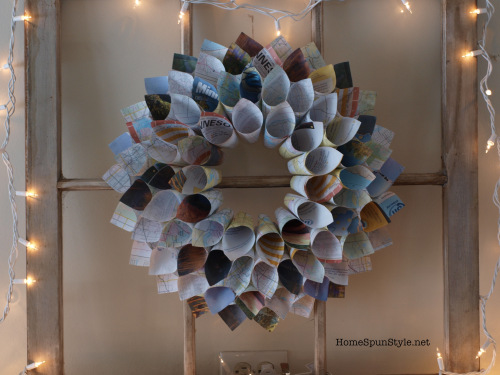
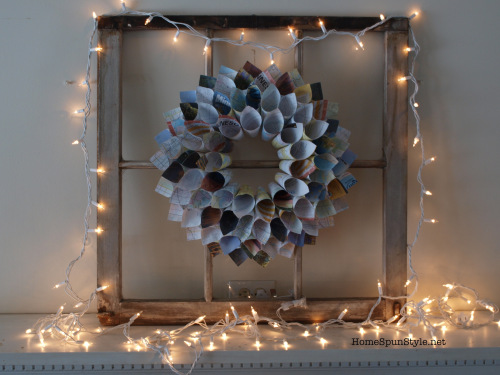
I finally got around to making my Minnesota Map wreath for the mantle. For directions on how to make this click here.
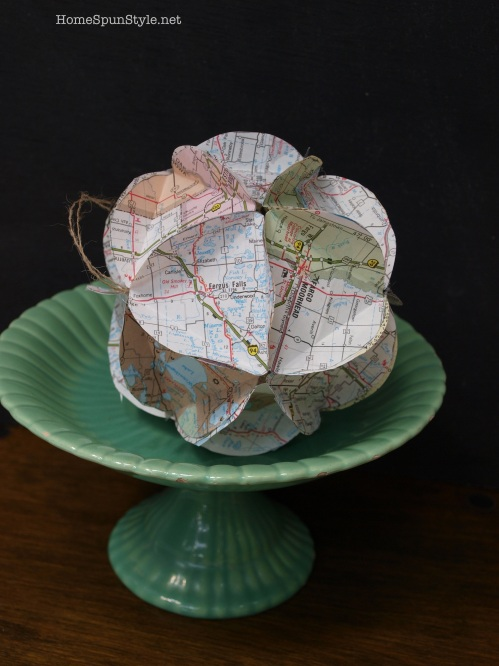
Map orbs: (directions)
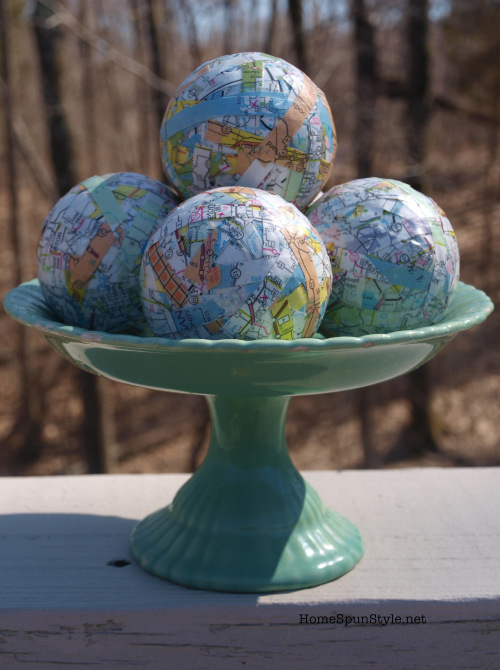
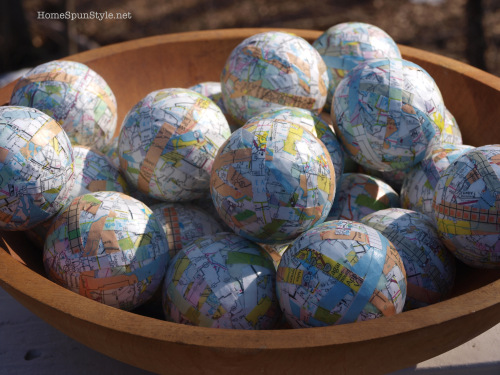
I like to call these “mini globes”: (directions for these are the same as for our upcycled Christmas balls)
And finally, the Map Picture Frame:
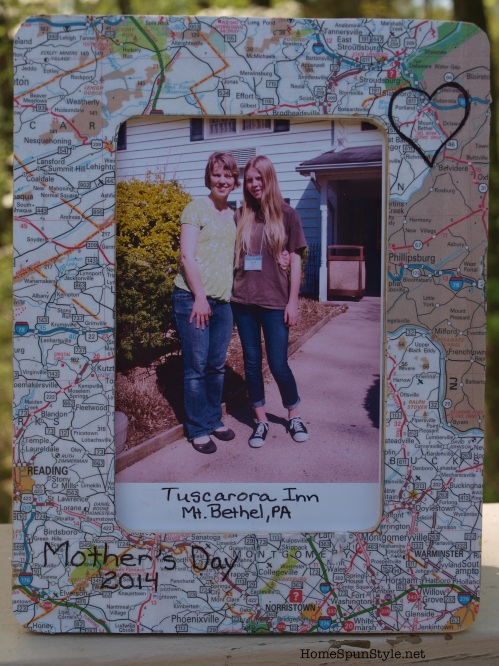
This would also make a great Father’s Day gift. These frames are super easy! All you need is a plain flat wooden frame (this one was purchased from Michael’s for $1), Mod Podge and a map.
Directions: Trace the frame onto the map making careful note of the direction of your photograph that will be used for the frame. Using a foam brush, apply a thin coat of Mod Podge to the surface of the frame. Place the cut out map on top of the glue and adjust. Allow to dry and apply another coat of Mod Podge to the top of the map. Use an xacto knife to clean up any edges that may be hanging over the edge too far. Apply several more coats of Mod Podge if desired. I used a Sharpie to write the date on the frame and to note the location of the retreat where we were staying.
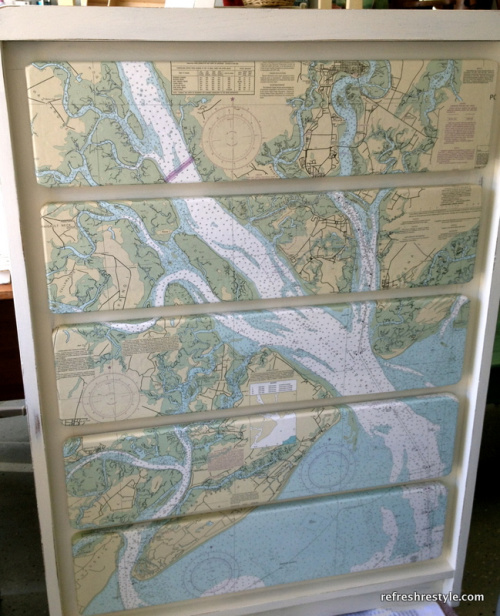
For a larger map project you could try your hand at making this cute map dresser (Refreshrestyle):
Maps are a great way of personalizing your decorating and commemorating a favorite location, whether it’s your hometown or a favorite vacation spot. Hope you try one of these simple projects!
Happy crafting!
Elizabeth
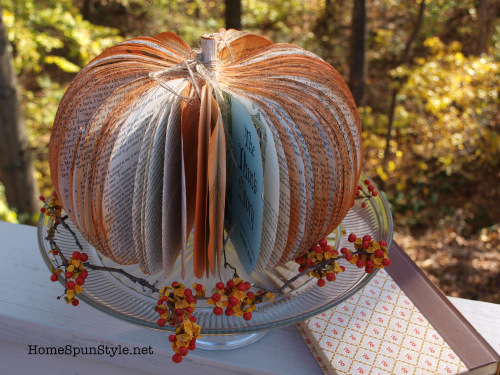
Book Page Pumpkins

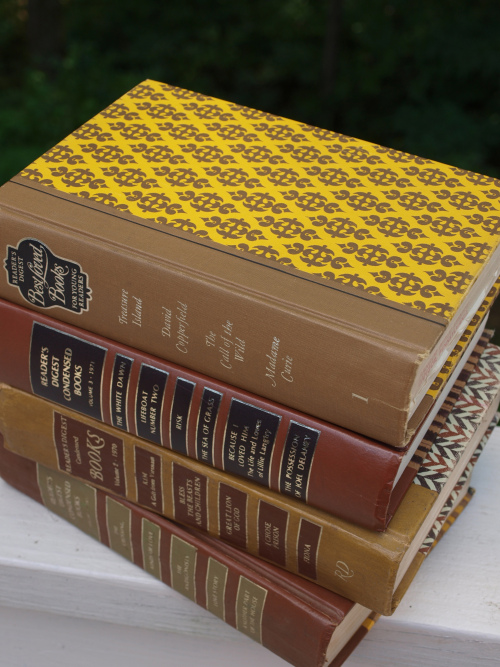
Instead of carving up pumpkins this year consider making this book page pumpkin out of an old book and bring it back year after year. I like using vintage Reader’s Digest books because I know that they’re readily available at almost any thrift shop. I’ve amassed a huge collection over the years for crafting purposes. With the beautiful covers, I also enjoy using them to bring in seasonal colors for decorating.
Supplies:
vintage books ( I like to use books where the pages have started to fade and yellow with age)
craft knife
scissors
paper template
pencil
glue gun and glue
ribbon or twine
orange spray paint
Directions:
1.) Using your craft knife, remove the cover from the rest of the book . Save the cover for future projects (like this great sewing box).
2.) Make a template in the shape of a half pumpkin (basically the shape of the upper case “D”).
3.) Place the “D” template with the straight line up to the binding of the book. Trace and cut out five pages at a time. Each time, cut slightly inside your tracing mark. Hopefully, this will keep your pages more uniform.
4.) Cut off any leftover binding and save for your “stem”.
5.) Open up your pumpkin and glue the front page to the back page by running hot glue in a straight line closest to the binding.
6.) Lightly spray paint the pumpkin orange.
7.) For the stem, I simply rolled up the leftover inside binding and glued it to the top of the pumpkin using my glue gun. Tie the stem with the ribbon or twine of your choice. I like to use left over burlap strings.
For additional pictures and directions visit www.creationsbykara.com.
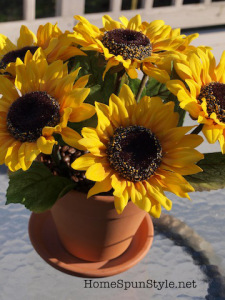
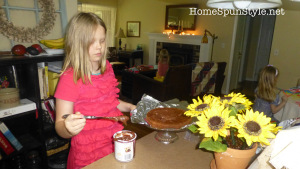
Flower Pens
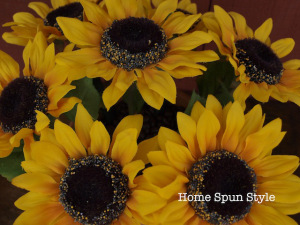
School’s out here and it’s been a rainy June so my crafty girls are looking for things to do. Flower Pens are an easy, cheap project that can be completed in a short time.
Supplies:
Flower pot and saucer
coffee beans (to anchor the pens)
pens
silk flowers
floral tape
wire cutters
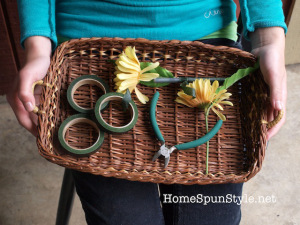
Directions:
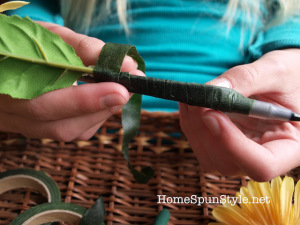
1.) Using your wire cutters, cut flower stem to desired length to fit pen
2.) Secure flower stem to pen by wrapping floral tape tightly around both stem and flower. Floral tape sticks to itself. It will be slightly sticky to the touch but that will go away after a while.
3.) Tape bottom of flower pot so beans don’t escape. Fill pot 3/4 full of coffee beans. If you like the smell of coffee, this will make your pens smell wonderful.
4.) Insert flower pens into beans
Since having these flower pens on my kitchen island, I’ve never had to look for a pen. It helps keep my busy household a little more organized!
Hope you give these a try!
ABOUT ME

I am passionate about creating comforting homes through sewing, repurposing, crafting and thrifting.
FOLLOW BLOG VIA EMAIL
Enter your email address to follow this blog and receive notifications of new posts by email.
Join 208 other followers
FOLLOW HOME SPUN STYLE ON FACEBOOK
FOLLOW ME ON PINTEREST

FOLLOW ME ON INSTAGRAM

CATEGORIES
- gardening
- Homemade gifts
- Inspirational
- kitchen
- knitting
- paper crafts
- Recipes
- Room Makeovers
- Spring
- upcycling
ARCHIVES
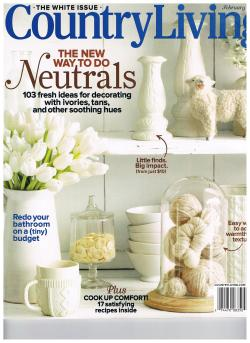
FEATURED IN COUNTRY LIVING MAGAZINE FEB 2012
THE BEACH HOUSE
