
CATEGORY ARCHIVES: UPCYCLING
Magnetic Chalkboards and the Hope Christmas Market
The Hope Christmas Craft Market in Hope, New Jersey is just around the corner on Saturday and Sunday, December 6th and 7th. This is our 6th year doing this show and we are excited about all the furniture pieces we have this year, along with new pillow designs, new wreath designs, new tote bag designs and lots of vintage home decor items.
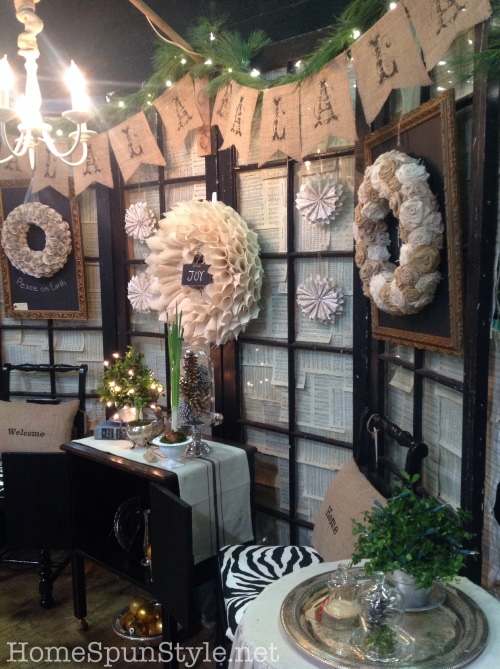
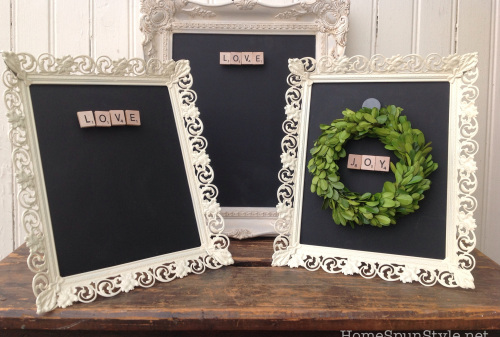
One of the new items I’ve been working on are these framed magnetic chalkboards.
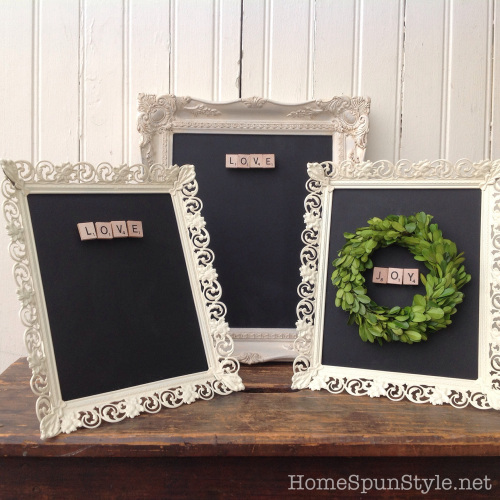
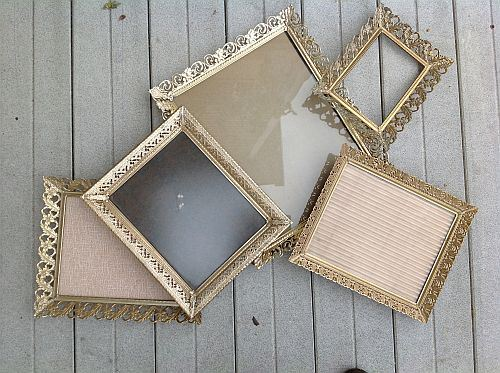
Each of these started out as an old metal or wood frame that got a face lift with paint. For the metal frames, I used Krylon spray paint in ivory satin finish and then coated them with poly-acrylic to prevent chipping.
I like how the ivory paint makes the metal edge look like lace.

For the distressed wood frame, I used several coats of SW creamy, followed by light sanding and then brushed on some dark walnut stain for an aged finish.
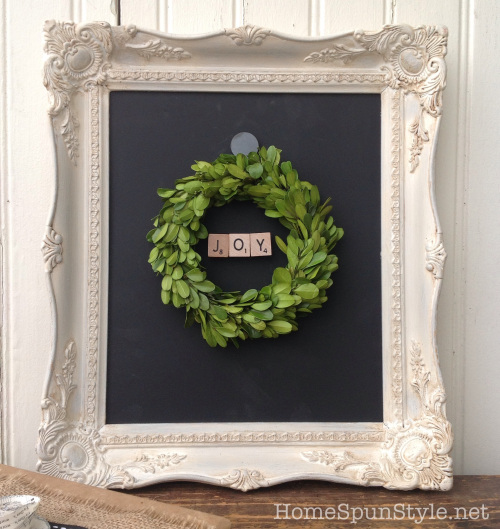
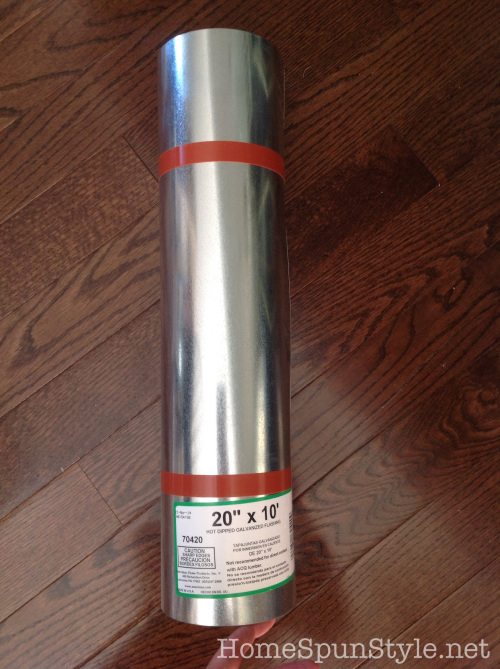
The chalkboard is simply a piece of galvanized roofing flashing, purchased from Home Depot. We used a utility knife to cut it to size and then coated it with 3 coats of chalkboard paint.
Whether used for displaying photos, artwork or a simple wreath, I love the flexibility of these frames with the use of magnets. Here, I used scrabble letters and hot glued them to small round magnets but really there is no limit to what could be used.
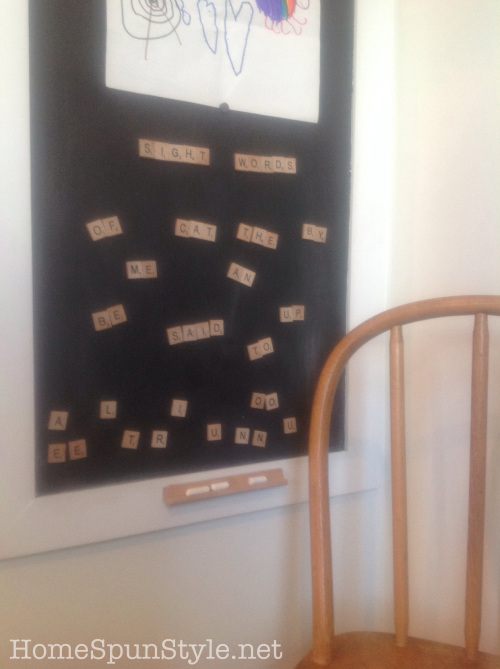
The inspiration for these framed chalkboards came from a project we completed earlier this month – a tall, wall mounted magnetic chalkboard for my kitchen “command center”.
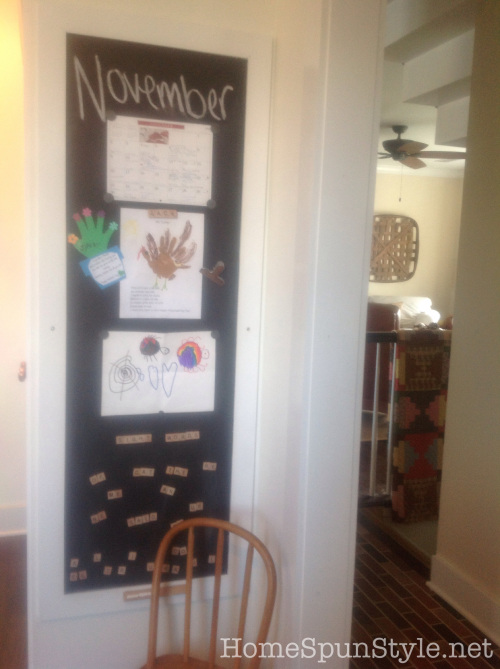
The roof flashing was the perfect width as it comes in a 20 inch wide roll by 10 feet in length. I used the same process as with the smaller frames of painting it with 3 coats of chalkboard paint. My husband framed it for me and then screwed it to the wall. (we still need to plug the screw holes).
It has really helped me stay organized with my calendar and notes at the top of the chalkboard in plain view. My son Jack gets the bottom half.
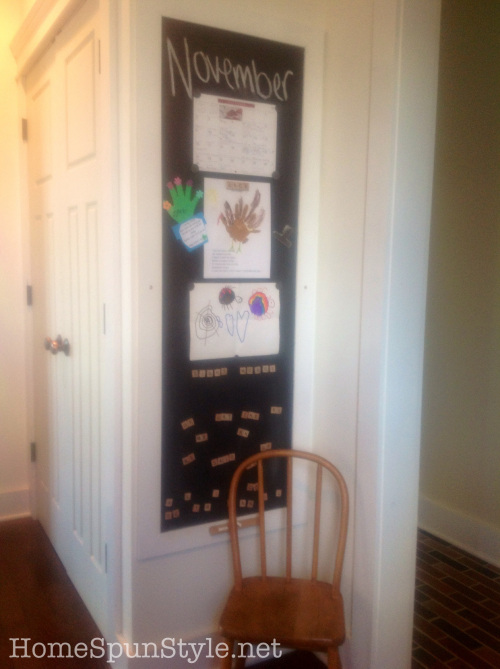
Scrabble letters were used for the magnets here as well, along with a scrabble game tray for holding chalk, which I hot glued to the frame. Easy peasy and perfect as a chalk tray!
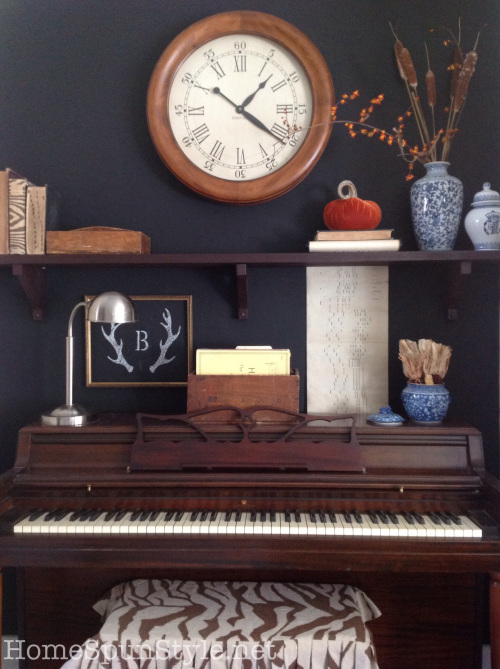
And while I am on the subject of chalkboard walls, I did a little more tweaking of our piano alcove:
In the coming days, we will be sharing more of the items that we will have available for sale at the Hope Show. Wishing you a blessed Thanksgiving! Debra
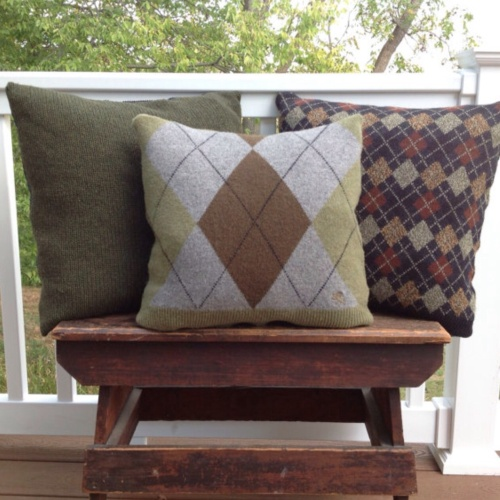
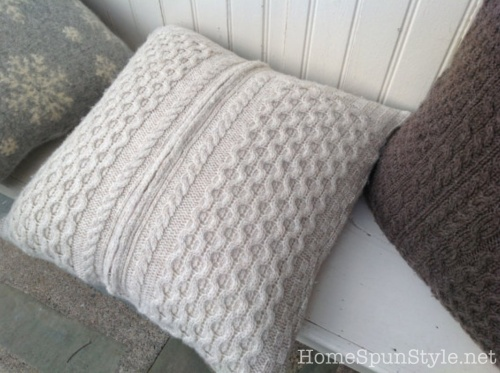
Sweater Pillows, Candle Cozies and More!
With the weather turning cooler and the leaves changing color, our thoughts have turned to cozying up our homes for fall. There’s nothing like wearing a soft, warm sweater for fall so why not incorporate them into your home decor? Elizabeth and I have enjoyed upcycling old sweaters that we find at thrift shops, rummage sales and even in our own closets.
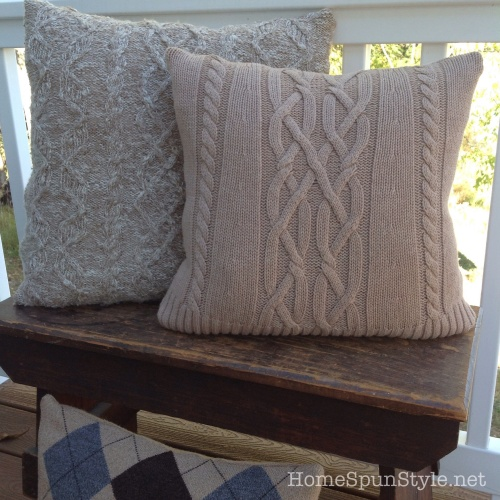
For pillows, we start by cutting the sleeves and turtleneck off (if there is one) and then cutting the remaining sweater into a standard size pillow (18 inch, 20 inch, 12×16 inch) .
The larger the sweater, the larger the pillow so a men’s XL or XXL sweater is great for this purpose. To make a sweater pillow you simply sew up 3 1/2 sides, and leave an opening to insert a pillow form. Sometimes you can use the existing side seams and just sew across the top and partially across the bottom. We finish the edges with a zigzag stitch to minimize fraying and then turn the pillow cover right side out. We insert a pillow form and then hand sew the opening. Lately, we have been adding a zipper so that the cover is removable for cleaning.
Here’s a few that are presently in our Etsy store:
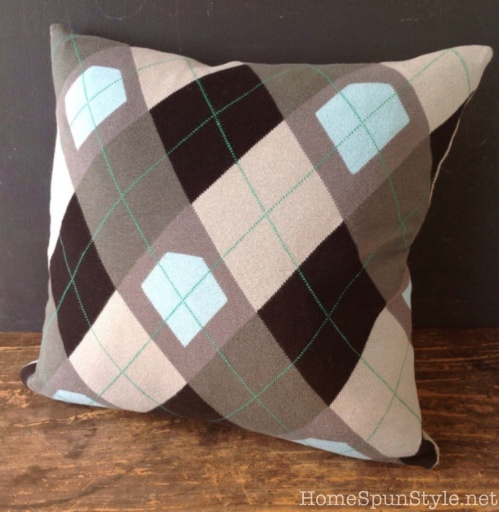
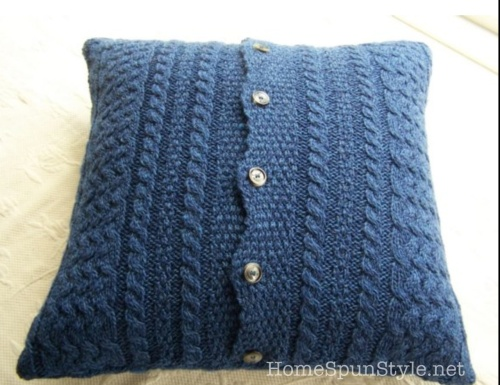
If a sweater already has buttons or a zipper up the front, you can actually incorporate it right into your pillow cover, like we did with this one:
and this one which had a zipper up the front:
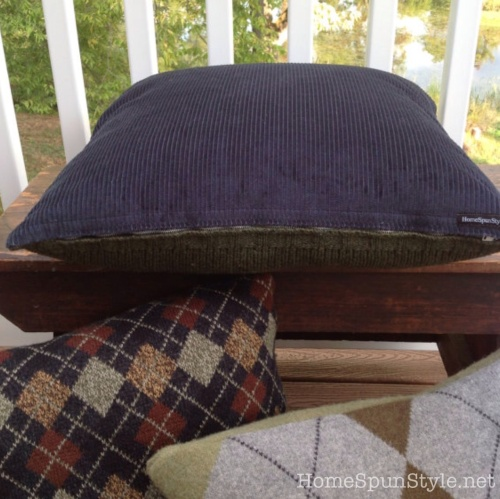
Sometimes we combine a sweater with a different fabric for the reverse side. Here’s one that is a combination of a green wool sweater on one side, and navy wide wale corduroy from a men’s shirt on the reverse side … two looks in one pillow!
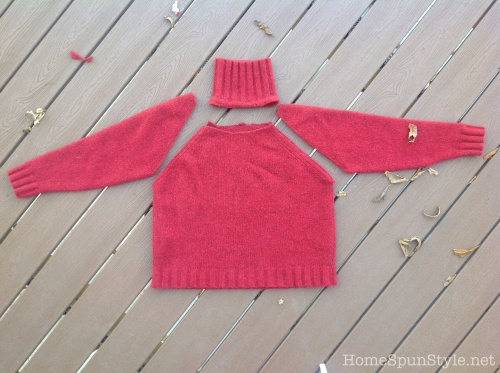
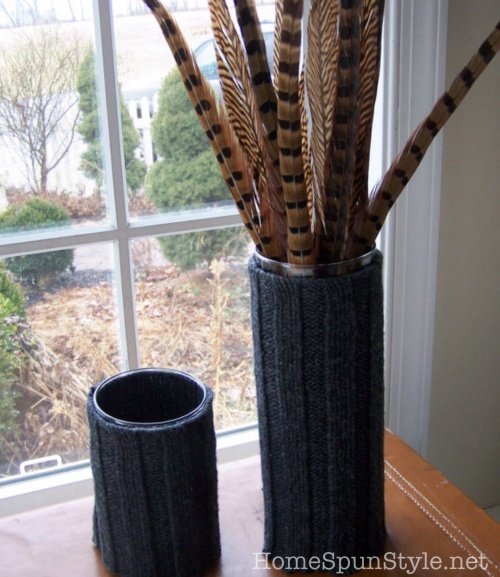
No piece goes to waste and that includes the sweater sleeves. These look great slipped over a vase or candle cylinder. Just cut the sleeves to the appropriate and hem the bottom raw edge either by hand or machine. Actually, I’ve been known to just leave the cut edge unfinished when it is for use in my own home! You can also use the neck of the sweater for a shorter vase. So simple.
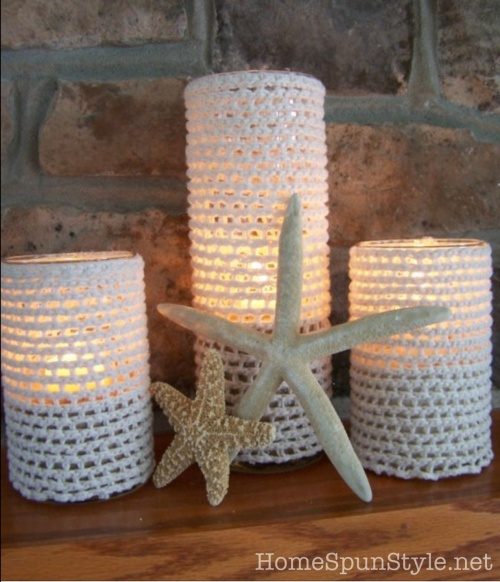
Here’s some we did that have a beachy look by using a cotton open weave sweater…so pretty with the candlelight peaking through:
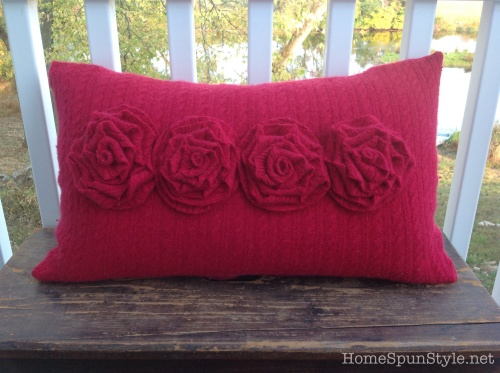
The sweater scraps get turned into flowers that can be pinned on to existing pillows to embellish them for fall. Lately, we’ve been experimenting with making larger ones for greater impact on a large pillow.
We showed how to make sweater flowers here.
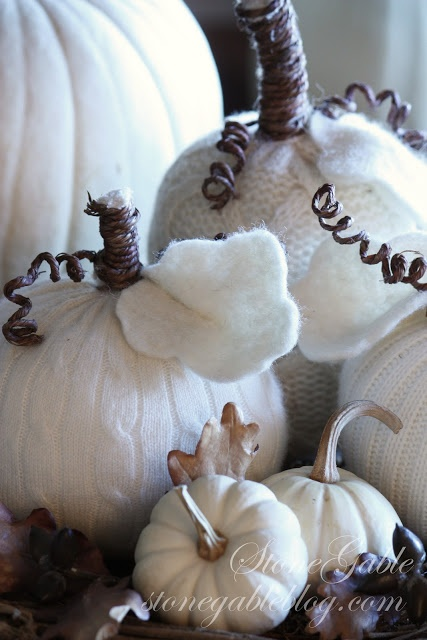
And check out these adorable sweater pumpkins made from sleeves from StoneGableblog.com! I am anxious to try this.
Hope you are enjoying adding some fall touches to your home!
Debra
ABOUT ME

I am passionate about creating comforting homes through sewing, repurposing, crafting and thrifting.
FOLLOW BLOG VIA EMAIL
Enter your email address to follow this blog and receive notifications of new posts by email.
Join 208 other followers
FOLLOW HOME SPUN STYLE ON FACEBOOK
FOLLOW ME ON PINTEREST

FOLLOW ME ON INSTAGRAM

CATEGORIES
- gardening
- Homemade gifts
- Inspirational
- kitchen
- knitting
- paper crafts
- Recipes
- Room Makeovers
- Spring
- upcycling
ARCHIVES
FEATURED IN COUNTRY LIVING MAGAZINE FEB 2012

THE BEACH HOUSE
