
CATEGORY ARCHIVES: PAPER CRAFTS
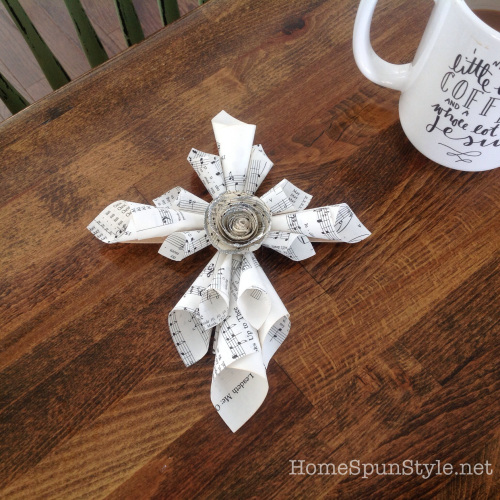
Mini Paper Hymnal Cross DIY
I have been working on a smaller version of the vintage hymnal cross I made last week. I plan to teach how to make this mini hymnal cross at a craft workshop during the upcoming Women’s Retreat so I needed to get it down to a science! An hour and a cup of coffee later, I came up with this:
Here’s how to make this smaller version:
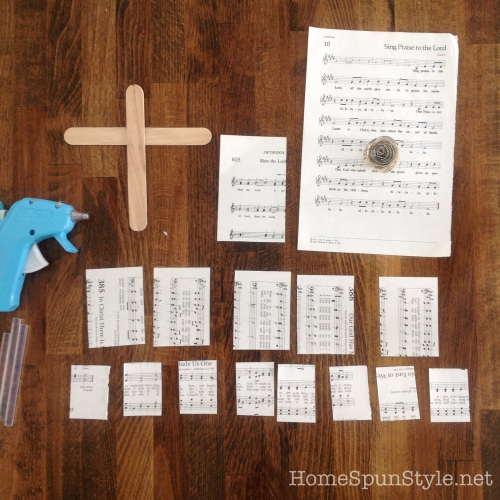
Supplies:
2 large popcicle sticks glued together in a cross formation
pages from an old church hymnal, sized as follows:
one 1/4 page
five 1/8 page
eight 1/16 page
one full page for the rosette
glitter (optional)
You will need to make 14 “cones” in total. Here is a link to how we make the cones.
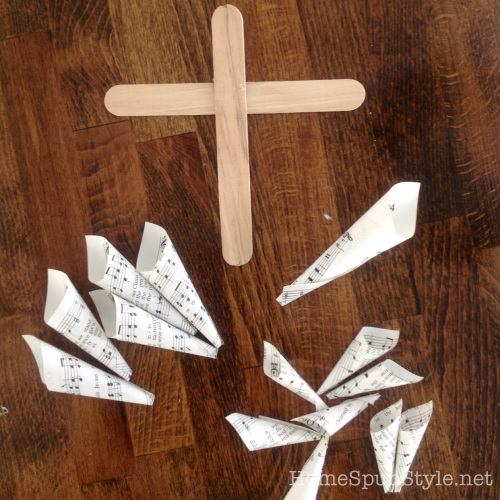
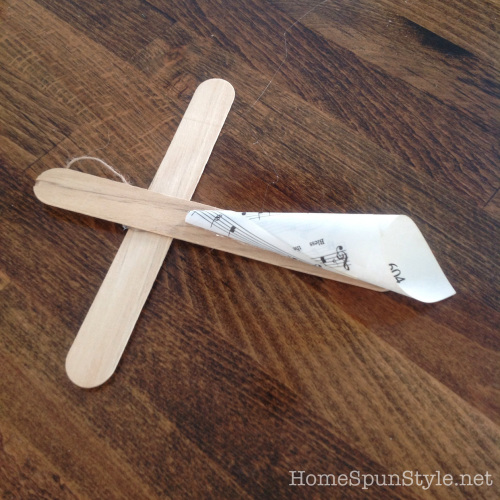
Before beginning, you will want to glue on a simple hangar or magnet to the back of your cross. I used some threads of burlap.

Then glue the largest cone on the bottom part of the cross. Overhang it a bit to be sure to cover up the popcicle stick.
Then glue on the five 1/8 page cones: 2 on each arm of the cross, 1 on the top of the cross, and 2 on each side of the bottom cone. Again, be sure to extend them a bit beyond the popcicle stick.
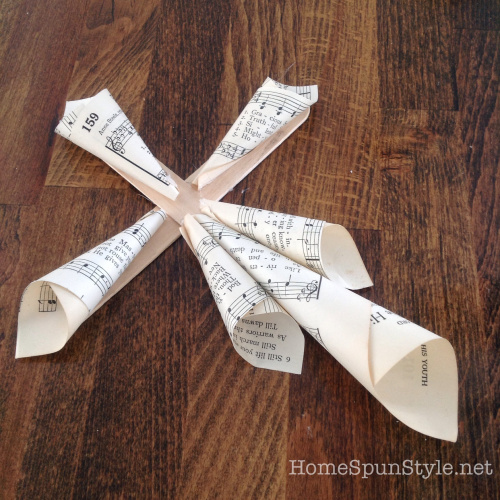
The eight 1/16 page cones will now be used to fill in the gaps and add texture and depth to the cross.
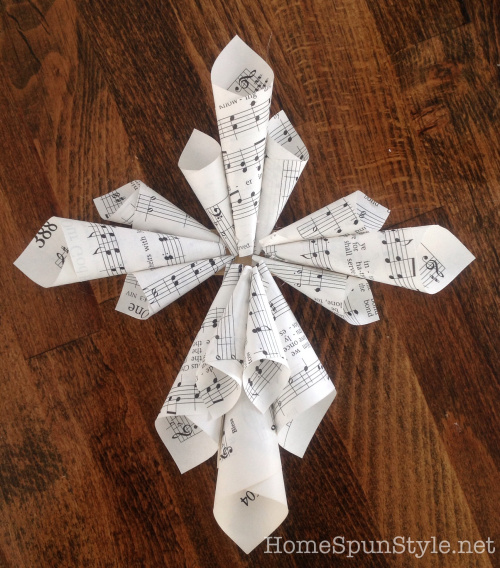
You will glue 2 on each side of the arms and the top. The remaining 2 cones get glued to the bottom of the cross, on top of the existing cones.
Using a paper rosette in the center is nice way to cover up any imperfections in the ends of the cones.
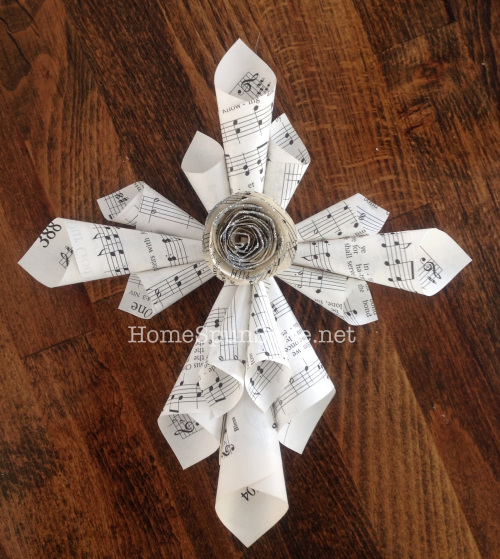
Here is link to making a rosette. If you want to glitter it, “dip” the face of the rosette in some white glue and then dip it again in some glitter. Then glue the rosette to the center of your cross.
That is the science of how to make the mini hymnal cross. The “art” part comes when you do your own thing from here, adding more cones in more sizes until you achieve a look that pleases you. Have fun and hope to see you at the Retreat!
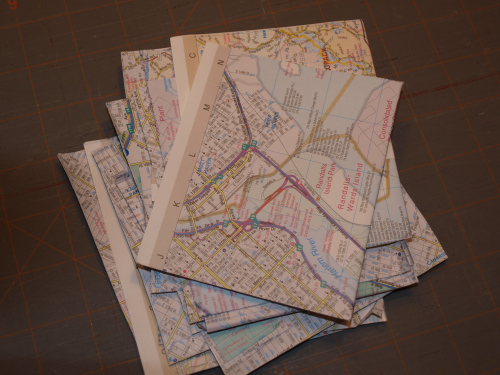
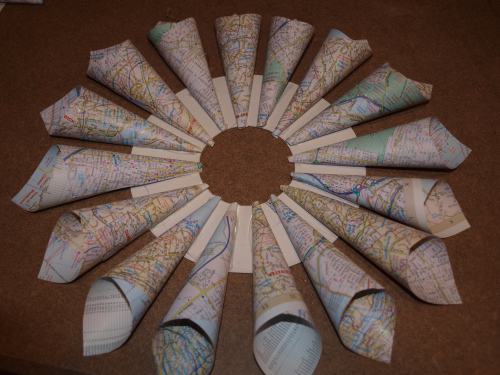
Map Wreath

I love to decorate with items that evoke memories and maps are a great way to commemorate a favorite location or special place. With GPS now built right into our smart phones, paper maps seem to be becoming a thing of the past. Before throwing out though, consider upcycling them into a beautiful wreath to decorate your home.
Here’s how:
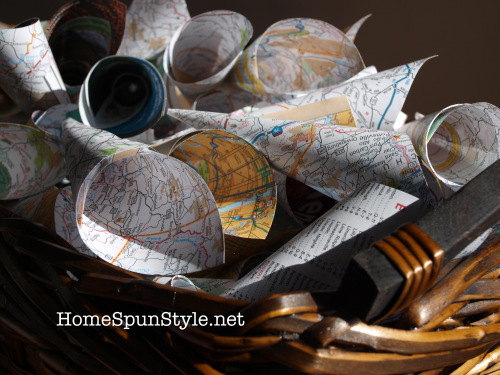
For the wreath shown above, I used two maps.
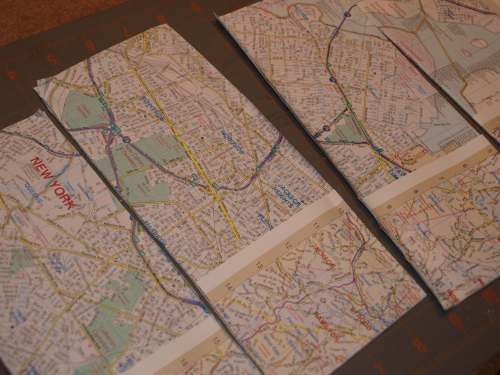
First cut maps along the folds. Then cut in half again.
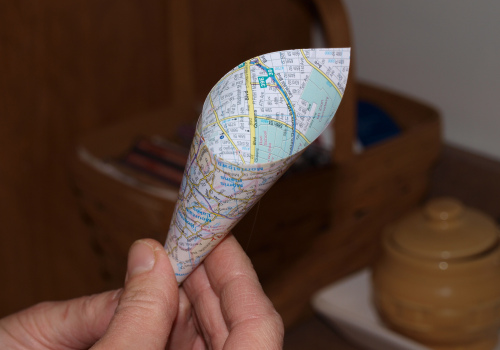
Hold paper horizontally, with right hand holding upper right corner and left hand holding lower left corner.
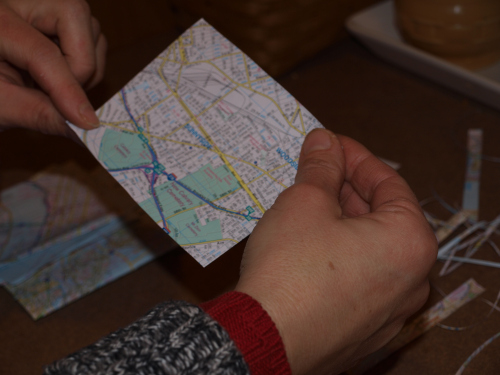
Bring corners towards each other and overlap.
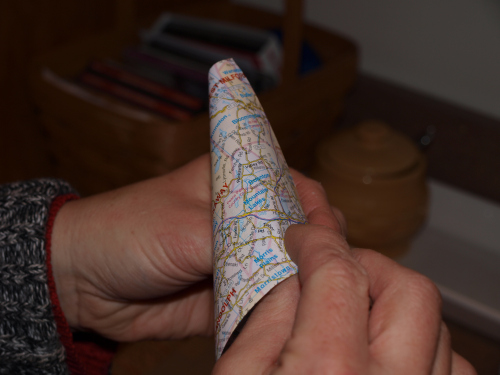
Hold the opening of the cone together with your right hand while pulling the paper tight with your left hand to make the cone shape. This will feel awkward at first but keep at it. Pretty soon you’ll be able to make them very quickly.
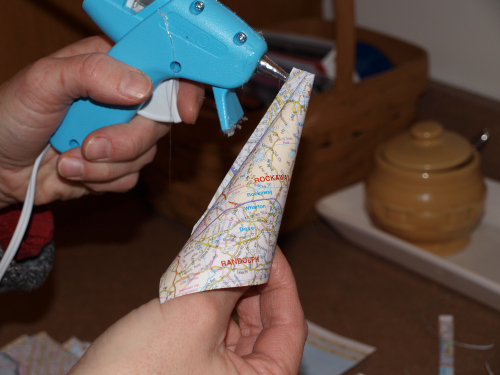
Run a strip of hot glue along the side of the cone to secure
Once you’ve rolled enough cones, you can begin assembling the wreath. The wreath that I made took 58 cones so you’ll need lots.
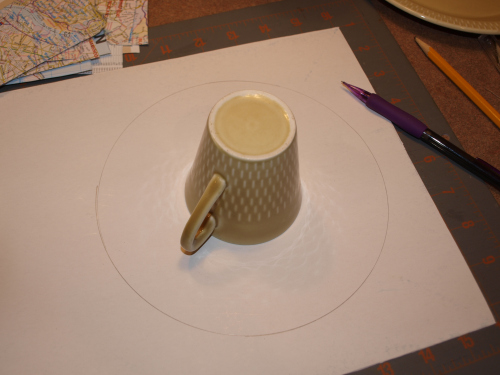
I used a light weight cardboard for the base of this wreath. I found that a shirt box left over from Christmas worked well but use whatever cardboard you have around the house. I used plates from my kitchen to trace two circles, one inside of the other, to make a doughnut shape. Mine measured 9 1/2 inches in diameter. Use what you have to get the size that you want.
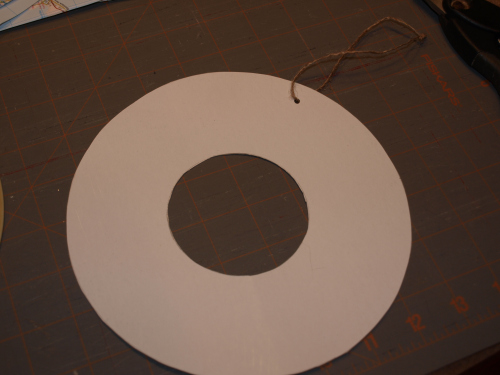
I then cut out the shape and added a hole punch to the top. Do this now as it’s hard to add the hole and string later.
Glue another layer of cones to this base layer, placing them slightly down closer to the inner circle. You can stop after two layers or continue on with another layer, depending on what looks best to you. I’ve made some with two layers and some with three. You need to step back and evaluate as the process goes on. In this particular wreath I didn’t like the way the tips of the cones were coming together so I added the third layer to “clean up” the center. I snipped a little bit of the cone before gluing in. This is what makes each one unique. Sometimes adaptation is needed in the creative process (but that’s what makes it fun!).
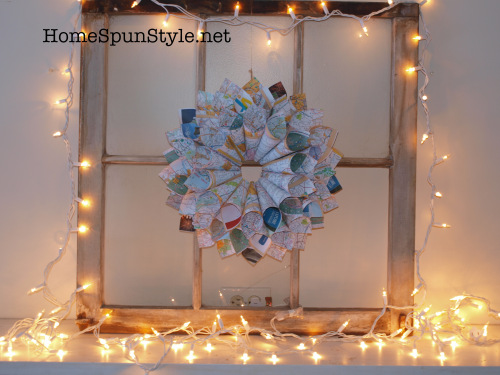
I’m happy with how it turned out although I think I’m going to make a larger one with maps that my mom just sent to me from my home state of Minnesota. Can’t wait to get it started! Hope you try this fun project and hope it brings back lots of good memories in the process!
ABOUT ME

I am passionate about creating comforting homes through sewing, repurposing, crafting and thrifting.
FOLLOW BLOG VIA EMAIL
Enter your email address to follow this blog and receive notifications of new posts by email.
Join 208 other followers
FOLLOW HOME SPUN STYLE ON FACEBOOK
FOLLOW ME ON PINTEREST

FOLLOW ME ON INSTAGRAM

CATEGORIES
- gardening
- Homemade gifts
- Inspirational
- kitchen
- knitting
- paper crafts
- Recipes
- Room Makeovers
- Spring
- upcycling
ARCHIVES
FEATURED IN COUNTRY LIVING MAGAZINE FEB 2012
THE BEACH HOUSE
