
CATEGORY ARCHIVES: SPRING
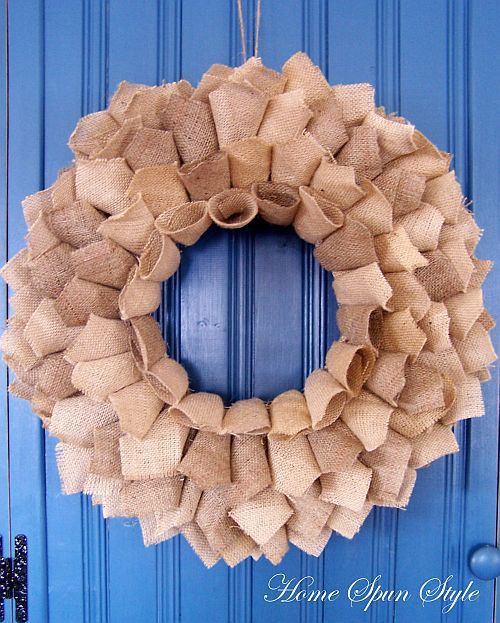
Burlap Wreath Tutorial
I don’t think we will ever tire of using burlap in our home furnishings line – it works with any color scheme and adds so much texture to a room.
That said, we end up with a lot of small pieces left over from larger projects. I recently put those scraps to use in a burlap wreath. I love how it turned out and it was fairly easy (albeit time consuming!) to make.
I found a tutorial for making it at Made in a Day. I made a few changes to the process as follows:
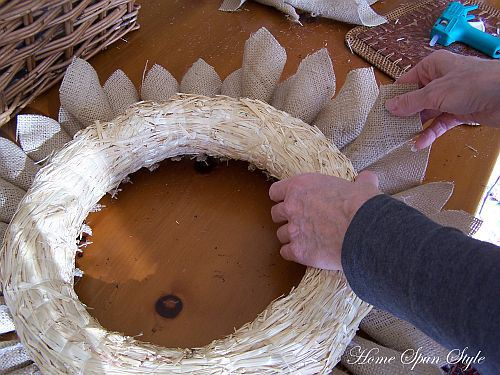
For my wreath, I used a 14″ straw wreath, burlap scraps and lots of hot glue. Kim at Made in a Day used burlap ribbon for her wreath but since we have tons of burlap scraps, I used them instead.
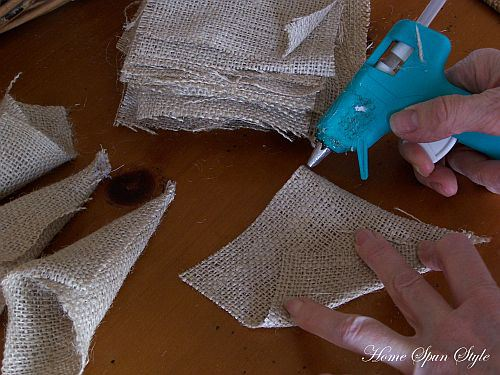
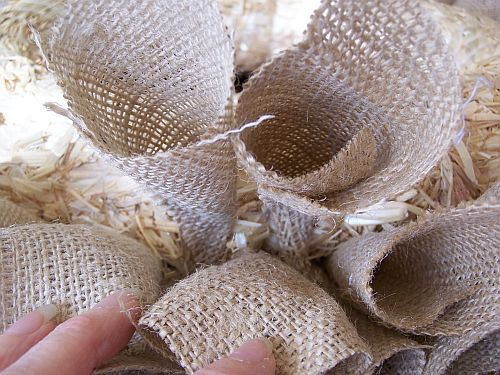
Step 1: Cut the burlap into 4 inch squares. A rotary cutter and cutting mat work great for this. I used a total of 150 squares for my wreath.
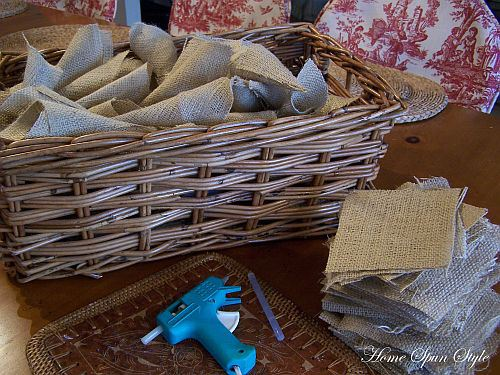
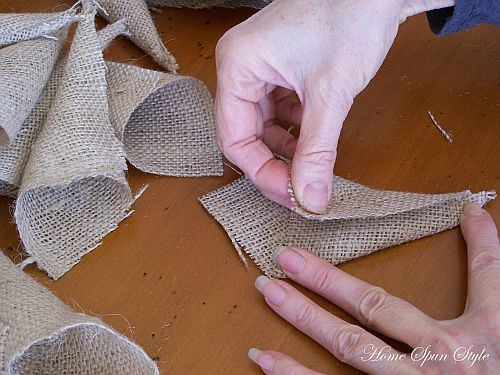
Step 2: Shape the squares into a cone shape like this ( a picture truly is worth a 1,000 words!) and secure into place with glue:
Step 3: Glue the first layer of cones to the back side of the wreath. I used 29 cones.
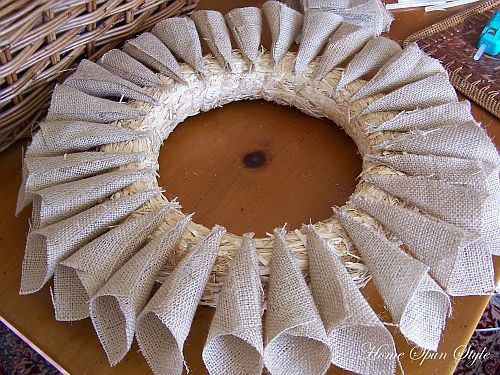
Step 4: For the second layer, glue them to the back, positioning them in between the other cones and a little closer to the outside edge. Here again, 29 cones.
Step 5: For the third layer, fold the bottom inch of the cone back and glue to the outside edge of the wreath. You may need a little extra glue on the back side of these cones (securing them to the previous layer) so they lay flat. 29 cones.
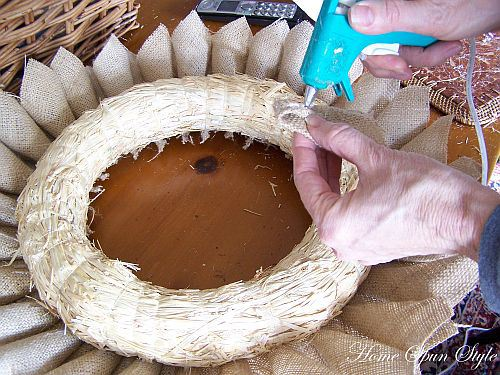
Step 6: For the fourth layer, cut about 1 inch off the tip of the cone and glue from the front. 25 cones.
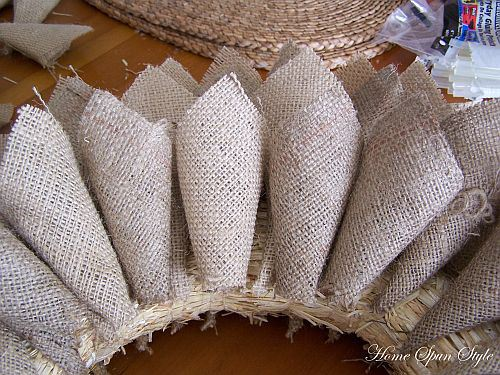
Step 7: For, the fifth layer continue to use the shorter cones, positioning them closer to the center of the wreath. 22 cones.
Step 8: For the 6th and final layer, glue the shorter cones to the inside edge of the wreath, covering all of the exposed straw base. 16 cones.
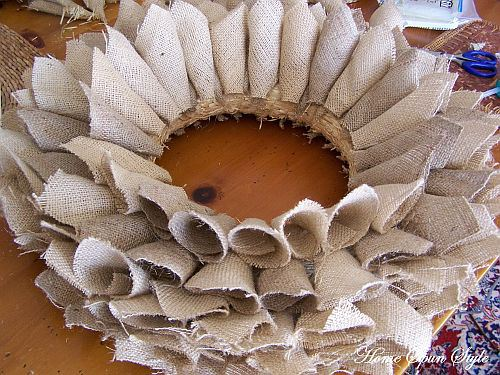
Step 9: Once you have all your layers, it may be necessary to go back and fill in any empty spots with more cones.
Step 10: Trim off all the burlap strings, glue a simple twine hangar to the back (or use ribbon) and step back and admire.

This is a great basic wreath that you can easily embellish seasonally or use ribbon to coordinate with your color scheme.
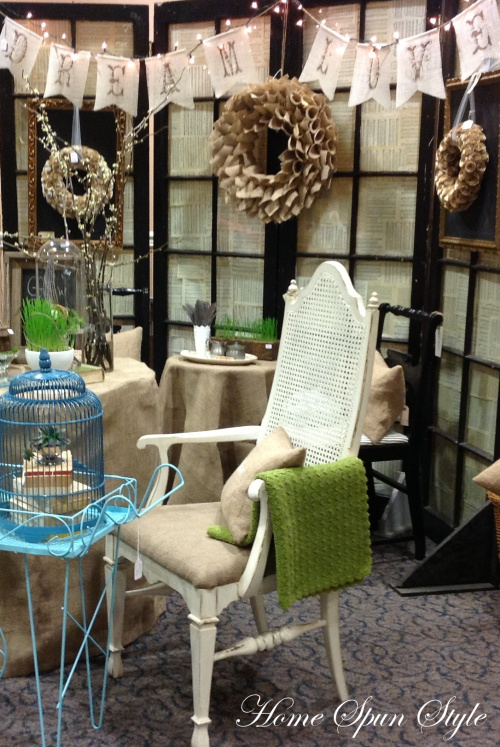
2013 Women’s Retreat
Elizabeth and I are at the Women’s Retreat at the Tuscarora Inn this weekend. We’ve been hard at work on our Spring display and tomorrow we’ll be doing a paper crafting workshop for the women.
Here are a few pics from today:
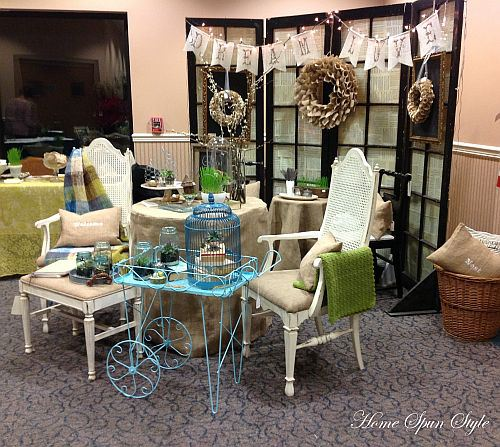
We still love to use burlap in many ways but for spring we’ve added punches of turquoise and green to our display.
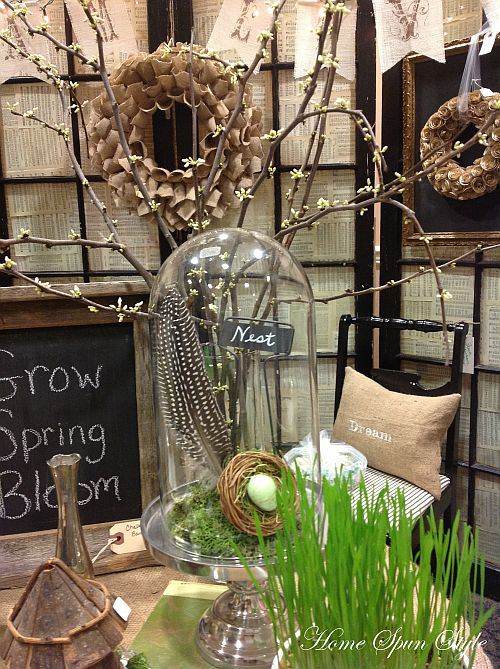
We love cloches … both glass and these chicken wire cloches we made.
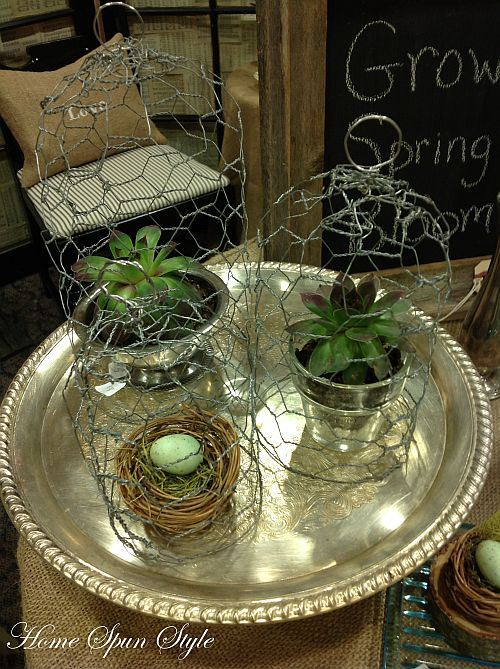
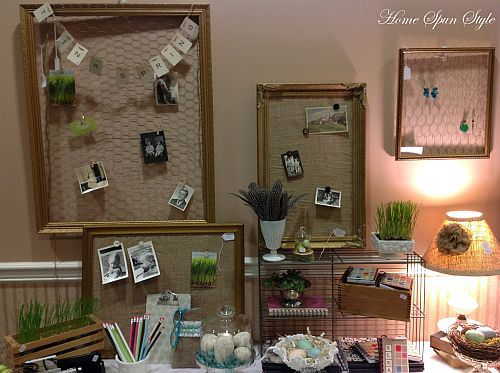
We’re also using chicken wire in vintage frames for bulletin boards and as jewelry organizers.
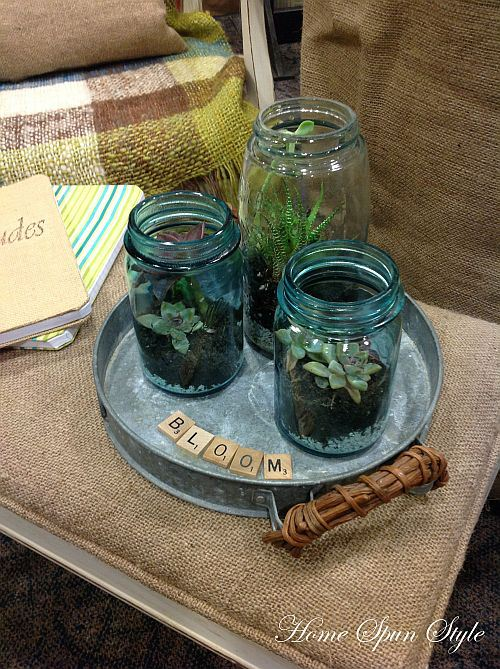
We are smitten with succulents this year. These little “hens and chicks” make for hearty indoor house plants. The hens just keep on producing!
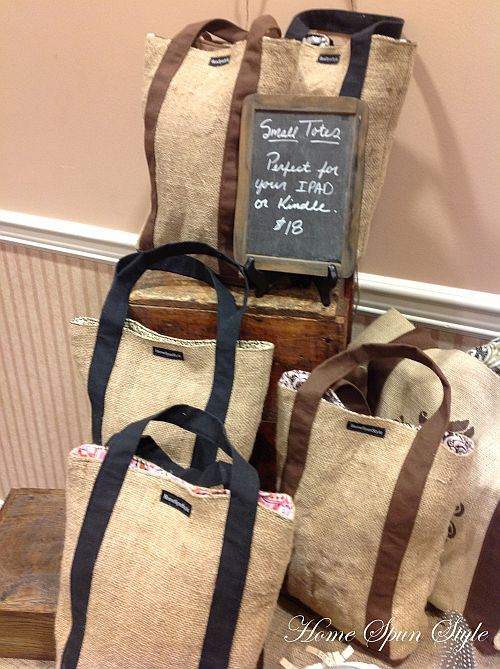
New for the retreat is our washed burlap tote sized for an Ipad or Kindle.
We’ve packaged up our mini sheet music wreaths with pretty blue filler for Easter gift giving.

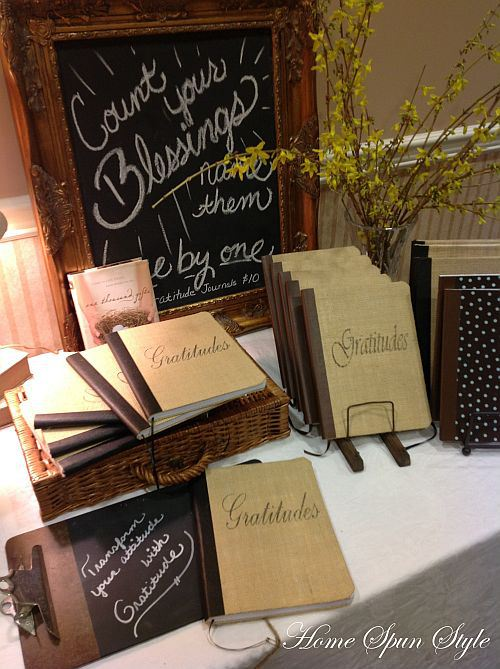
Another new item is our Gratitude journals. These are altered composition books that we’ve done in burlap. Each has a book plate and satin page marker … a pretty way to memorialize God’s blessings.
Although it still feels like winter outside, there is Spring in the air inside at the retreat!
Hope to see you tomorrow at our paper crafting workshop!
A Woodland Inspired Spring Tablescape
It seems whenever we are working on someone’s home some element of the makeover weaves its way into my own home decor. Working on The Manor House at The Pines was no exception. We spent so many afternoons there, enjoying the woodsy, earthy surroundings as we worked that, almost without realizing it, I began bringing a few nature elements into my own home. So here’s my woodland-inspired spring tablescape for my kitchen island:
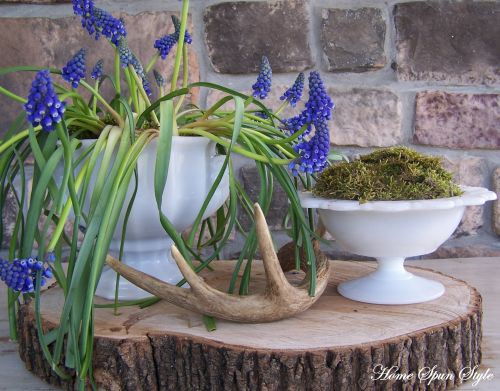
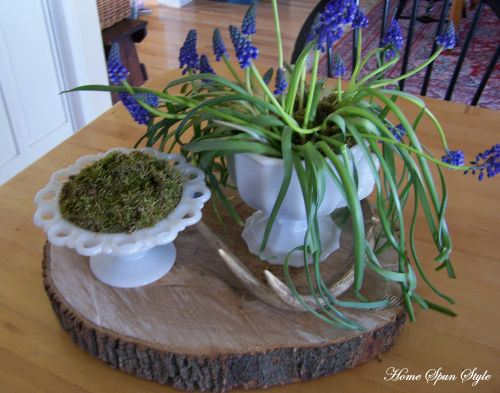
The slab of tree trunk came from my husband’s woodpile. I dug the grape hyacinths out of my flower bed (to be put back to bed later). The moss was growing along the edge of our property (there are styrofoam peanuts underneath as filler). And, the deer antler adds some visual and tactile interest.
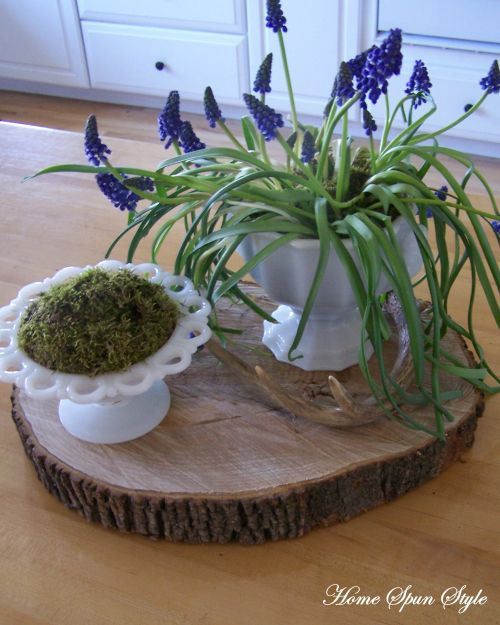
I like the combination of the rustic nature elements with the elegant milk glass. You can find these vintage milk glass pieces along with many more in our Etsy shop if you like them, too! Happy Spring! Debra
ABOUT ME

I am passionate about creating comforting homes through sewing, repurposing, crafting and thrifting.
FOLLOW BLOG VIA EMAIL
Enter your email address to follow this blog and receive notifications of new posts by email.
Join 208 other followers
FOLLOW HOME SPUN STYLE ON FACEBOOK
FOLLOW ME ON PINTEREST

FOLLOW ME ON INSTAGRAM

CATEGORIES
- gardening
- Homemade gifts
- Inspirational
- kitchen
- knitting
- paper crafts
- Recipes
- Room Makeovers
- Spring
- upcycling
ARCHIVES
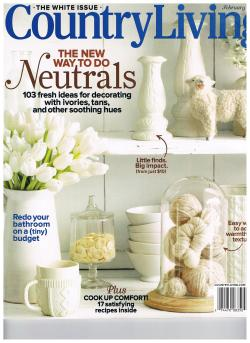
FEATURED IN COUNTRY LIVING MAGAZINE FEB 2012
THE BEACH HOUSE
